
I have the same metabolism. It sucks.

The beaver is a proud and noble animal
Notes from a bemused canuck

I have the same metabolism. It sucks.
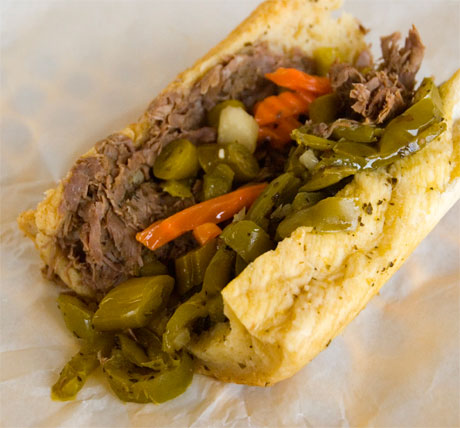
Italian Beef is made by slowly roasting lean beef in a pan filled with seasoned beef-based stock. Then it is sliced paper thin, soaked in the juice for a few minutes, and layered generously, dripping wet, onto sections of Italian bread loaves, sliced lengthwise. This crust is typically tan, only slightly crumbly, fluffy and white in the center, and high in gluten.
The meat is topped with sautéd green bell pepper slices and giardiniera, which is usually a spicy hot blend of chopped serrano peppers, carrots, cauliflower florets, celery, olives, herbs, salt & pepper, packed in oil and/or vinegar. Finally juice is spooned over the toppings, making the bread wet and chewy.
Preparation time: 20 minutes.
Cooking time: Allow about 2 hours to cook and another 3 hours to firm the meat for slicing in the refrigerator if you don’t have a meat slicer. You need 90 minutes to cook a 3 pound roast, or about 30 minutes per pound. You can cook this well in advance and refrigerate the meat and juice and heat it up as needed. You can even freeze it. This is a great Sunday dish because the smell of the roasting beef and herbs fills the house. After you cook it, you need another 30 minutes to chill it before slicing.
Ingredients
The beef
1 boneless beef roast, about 3 pounds with most of the fat trimmed off. Top sirloin, top round, or bottom round are preferred in that order.
The rub
1 tablespoon ground black pepper
1 teaspoon onion powder
1 teaspoon dried oregano
1 teaspoon dried basil
1 teaspoon paprika
1/2 teaspoon crushed red pepper
The juice
6 cups of hot water
4 cubes of beef bouillon (see discussion below)
The sandwich
10 soft, fluffy, high gluten rolls, sliced lengthwise but hinged on one side or Italian bread loaves cut widthwise into 10 portions
3 medium sized green bell peppers
1 tablespoon olive oil, approximately
1 cup hot giardiniera
1) Mix the rub in a bowl. Sprinkle it generously on the meat and massage it in. There will be some left over. Do not discard it, we will use it in the juice. Let the meat sit at room temp for about 30 minutes. Meanwhile, preheat the grill or oven to 200°C/400°F.
2) Pour the water into a 9 x 13″ baking pan and heat it to a boil on the stove top. Dissolve the bouillon in the water. It may look thin, but it will cook down and concentrate during the roasting. Pour the remaining rub into the pan. Everyone has their own secret. Many, like Al’s #1 (my fave), put the meat in the juice, submerged half way while it roasts rather than hovering above it. Roast at 200°C/400°F until interior temperature is about 130°F/55°C for medium rare, about 30 minutes per pound (exact time will depend on the cut of meat, its thickness, and how well calibrated your oven is). This may seem long, but you are cooking over water and that slows things down. The temp will rise about 5°F more as it rests. Don’t worry if there are people who won’t eat medium-rare meat. The meat will cook further in step 5, and you can just leave theirs in the juice until it turns to leather if that’s what they want.
Beware. This recipe is designed for a 9 x 13″ baking pan. If you use a larger pan, the water may evaporate and the juice will burn. If you have to use a larger pan, add more water. Regardless of pan size, keep an eye on the pan to make sure it doesn’t dry out during cooking. Add more water if necessary.
3) While the meat is roasting, cut the bell peppers in half and remove the stems and seeds. Rinse, and cut into 1/4″ strips. Cook the peppers in a frying pan over a medium high heat with enough olive oil to coat the bottom, about 1 tablespoon. When they are getting limp and the skins begin to brown, about 15 minutes, they are done. Set aside at room temp.
4) Remove the roast and the juice pan. Pour off the juice, put the meat back in the pan, and place it in the coldest part of the refrigerator. Let it cool for a few hours, long enough for the meat to firm up. This will make slicing easier. Chill the juice, too, in a separate container. Slice the meat against the grain as thin as humanly possible, preferably with a meat slicer. If you don’t have a slicer, use a thin blade and draw it along the meat. If you try to cut down or saw through the crust you will be cutting it too thick.
5) Taste the juice. If you want you can thin it with more water, or make it richer by cooking it down on top of the stove. Turn the heat to a gentle simmer. Soak the meat in the juice for about 1 minute at a low simmer. That’s all. That warms the meat and makes it very wet. You can’t leave the meat in the juice for more than 10 minutes or else it starts to curl up, squeezes out its natural moisture, and toughens.
6) To assemble the sandwich, start by spooning some juice directly onto the bun. Get it wet. Then lay on the beef generously. Spoon on more juice (don’t burn your hand). Top it with bell pepper and, if you wish, giardiniera. If you want it “wet”, dip the whole shootin’ match in juice. Be sure to have plenty of napkins on hand.
I was cooking this when the Tesco delivery man brought our grocery order. He was *very* complimentary about the smells wafting out of the kitchen. Stewing steak, onions, carrots, celery, swede, mushrooms, bay leaf, cumin, oregano, paprika, chipotle chili, and cocoa powder. Simple, yet highly effective.
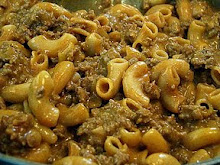
This is a bit embarrassing, as a decent cook, but I used to love Hamburger Helper. I’ve been unable to eat it since my allergies cropped up. I liked was the standardization of the directions in every variety, along with the cutting open of packets and throwing it in the pot. It requires little thinking, which is often what you need at the end of a long day when you’re tired and everyone is hungry.
But, the Internet is your friend! Make your own helper, thought I! You can even make it in advance so it’s all pre-measured and ready to toss in the pot on busy nights. Just like store-bought helper, your homemade helper comes with standardized directions and “packets” to throw in the pot. Very little thinking required–but in this case, it’s much more fresh and you can feel a whole lot better about feeding it to your family.
Hamburger Helper Basics
When creating your own helpers, keep in mind that most packages of Hamburger Helper include about 1 1/2 cups of pasta plus a packet of sauce seasonings, depending on the variety.
After browning and draining half a kilo of ground beef, in the same skillet you add water and milk (usually about 3 cups total), seasonings, and simmer (usually about 12-20 minutes). Add cheese near the end for some varieties.
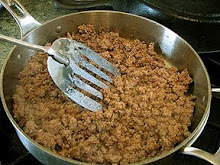
Brown ground beef in a large frying pan and drain.
Add hot water and milk:
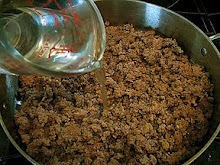
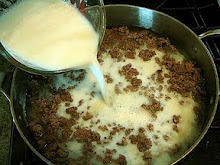
Add pasta and your homemade sauce packet:
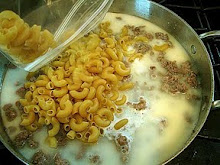
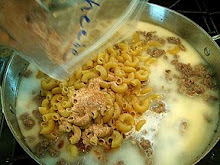
Bring to a boil. Cover and simmer on low about 12 minutes, stirring occasionally, until pasta is tender.
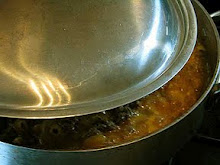
When the pasta is tender, turn off heat and uncover. Let mixture stand, uncovered, about five minutes. It will continue to thicken as it stands.
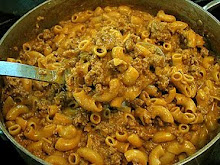
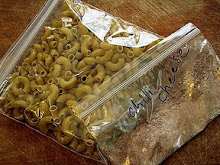
You can make your Homemade Hamburger Helper in advance by pre-measuring the pasta. Place in a sandwich-size baggie. Snack-size baggies are perfect for the sauce mix. The measured pasta can be used in a number of Hamburger Helper varieties. Just label the sauce mix so you’ll know what you’re picking up then grab whichever bag of pasta you need.
Spice mixes
Chili Mac: Using 1 pound ground beef, 2 1/4 cups hot water and 1/2 cup milk, 1 1/2 cups elbow macaroni, and 1 cup stewed or diced canned tomatoes, prepare a sauce packet including 1 tablespoon corn starch, 1 tablespoon chili powder, 1 teaspoon onion powder, 1 teaspoon salt, and 1 teaspoon sugar. Stir in 1/2 cup shredded cheddar cheese near the end.
Lasagna: Using 1 pound ground beef, 2 1/4 cups hot water and 1/2 cup milk, 1 1/2 cups either lasagna broken into small pieces or small egg noodles, and 1 cup stewed or diced canned tomatoes, prepare a sauce packet including 1 tablespoon corn starch, 1 tablespoon mixed Italian herbs, 1 teaspoon onion powder, 1 teaspoon salt, and 1 teaspoon sugar. Stir in 1/2 cup mozzarella, shredded, near the end, then sprinkle the top with parmesan cheese during the 5-minute standing period.
Beef Stroganoff: Using 1 pound ground beef, 1 cup hot water and 2 cups milk (if you have sour cream, replace 1/2 cup of the milk with sour cream), and 1 1/2 cups small egg noodles, prepare a sauce packet including 1 tablespoon corn starch, 1 teaspoon onion powder, 1 teaspoon parsley, 1 teaspoon salt, 1 teaspoon sugar, 1/2 teaspoon pepper, 1/2 teaspoon mustard powder with an add-in of 1 cup sliced fresh mushrooms.
Beef Goulash: Using 1 pound ground beef, 1 cup hot water and 2 cups milk (if you have sour cream, replace 1/2 cup of the milk with sour cream), and 1 1/2 cups small egg noodles, prepare a sauce packet including 1 tablespoon corn starch, 1 teaspoon onion powder, 1 teaspoon parsley, 1 teaspoon salt, 1 teaspoon sugar, 1/2 teaspoon pepper, 1/2 teaspoon paprika, 1/2 teaspoon italian seasoning with an add-in of 1 tin of tomatoes and 1/2 cup of frozen peas.
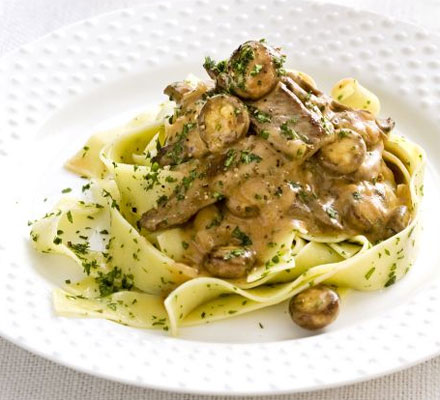
Ingredients
400g beef rump steak, trimmed
1 tbsp butter
1 tbsp olive oil
300g small button mushrooms
250g pappardelle pasta
3 shallots, finely chopped
1 tbsp plain flour
300ml beef stock
1 tbsp Dijon mustard
1 tbsp tomato purée
3 tbsp crème fraîche (or Greek yogurt)
flat-leaf parsley, chopped
1. Freeze the beef for 45 mins before you begin, slice as thinly as you can, then season.
2. In a large, non-stick frying pan, melt half the butter with half the oil. Increase the heat, then quickly sear the beef in batches until browned on both sides. Remove the meat and set aside. Repeat with the mushrooms, then set aside with the beef. Boil the pasta.
3. Add the remaining butter and oil to the pan and soften the shallots for a few mins. Stir in the flour for 1 min, then gradually stir in the stock. Bubble for 5 mins until thickened, then stir in the mustard, purée, crème fraîche and seasoning. Bubble for 1 min more, then return the beef and mushrooms to the pan.
4. Drain the pasta, toss with half the parsley, season, then serve with the creamy stroganoff, sprinkled with the remaining parsley.
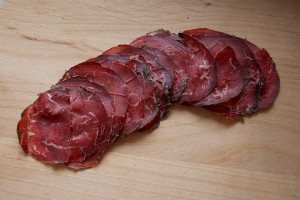
Bresaola is salted and dried just like a salami but it’s made from a single muscle of beef. This means that, though the surface might develop a healthy bloom of mould while it dries, the inside of the meat is never exposed to the air making any kind of bacterial development much less likely.
There’s a common belief that we don’t “do charcuterie” in this country because our humid climate makes meat go off rather than dry; that’s a complete myth. You actually need a cool, moist environment for curing, preferably with a decent breeze. If a sausage or piece of meat dries quickly in dry air the outside becomes hard too quickly, preventing the moisture from escaping from the centre. In moist air the outer surface remains pliable as the meat dries evenly throughout. Most of the best charcuterie in the world is cured in moist temperate climates, often in mountains or where a good clean sea-breeze can promote drying through evaporation.
This is obviously not an accurate description of conditions where I live in Camden Town but I’ve had great success drying meat in my kitchen, hanging close to a north facing window for maximum chill and breeze through the knackered sashes. I also tend to hang over the sink to keep the humidity up. If things get too hot I move things to the shade. In fact the more you can keep an eye on your meat, checking it daily, the better result you’re likely to get.
Many home curers starting out get jumpy when mould appears. Actually a chalk-white bloom on the surface is healthy and any spots of slimy or black mould can be spotted and quickly removed with plain vinegar – one good reason for a daily check. The best reassurance, though, is a good deep sniff. If your meat is going off you’ll definitely know by the smell in fact, in Italy this is still considered the only sure way to check. Testers use a long needle made from horse bone which can be slid into the ham or salami and sniffed to ensure there’s no trace of putrescence.
Have a go at a bresaola before the weather gets too hot (there’s a step by step picture gallery here). The cut of meat is cheap, the process simple and if you start now then by late June you’ll be smugly picnicking under the bougainvillea on your own charcuterie.
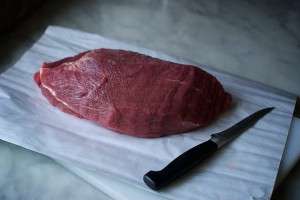
1. Ask your butcher for the main muscle in the top round. This is from the top of the leg, usually regarded as a second class roast but excellently lean and close textured for our purposes
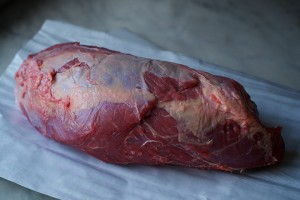
2. Trim off all the surface fat and silverskin. Be merciless, it all makes for great stock. Don’t try to remove the single vein of silverskin running through the centre of the muscle – your meat will fall apart if you do.
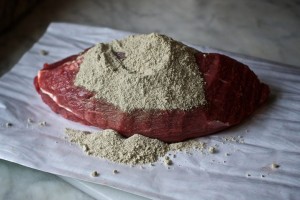
3. Make up your dry cure from 100g of coarse salt, 100g of sugar, 5g black pepper and 5g of Prague Powder #2. (easily available online here). You can go off piste with the aromatics if you like but I favour the traditional rosemary and juniper. Put the lot through the grinder and reserve half the cure in an airtight jar.
4. Rub half the cure into the surface of the meat and seal it into a freezer bag. Place the meat in the fridge and allow to marinate, turning daily. After a week, take the meat out of the bag, dry it with a paper towel and then rub with the second half of the cure. Reseal and marinate for a second week.
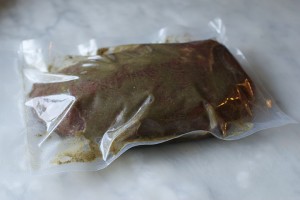
6. Remove any remaining cure and pat dry with paper towels. Tie two pieces of string vertically around the meat then tie a series of butchers knots horizontally around and wrap in clean muslin.
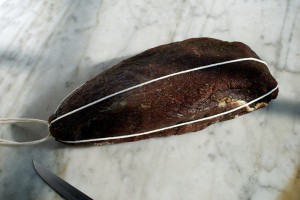
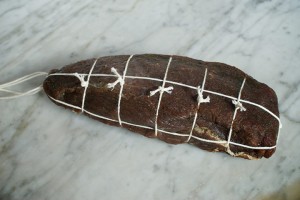
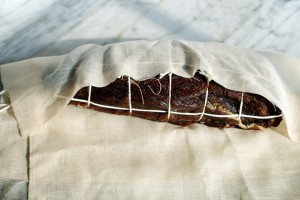
7. Label clearly with date and weight and hang in a cool place, not too dry. Check regularly by taking a good deep sniff for unpleasantness and weighing carefully. Your bresaola will be ready after around three weeks when it’s lost 30% of its weight.

8. I usually remove the muslin for the last week of drying. If there’s a great deal of mould on the surface I wash it off with a clean piece of muslin soaked in vinegar.
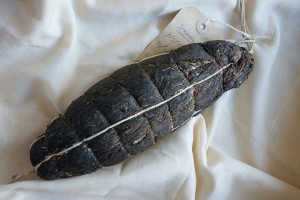
9. Slice paper thin and serve as it comes or with with a little olive oil and lemon juice.
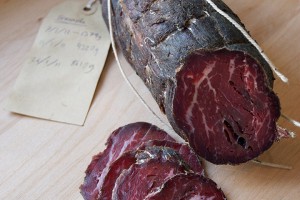
All images:
Original source: Tim Hayward for the Guardian
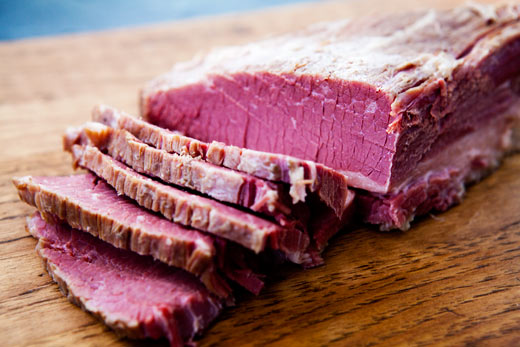
This is something I did earlier in the year, but forgot to blog about. Based on a recipe found here: http://simplyrecipes.com/recipes/home_cured_corned_beef/
Home Cured Corned Beef
The spice mix with the gallon of brine makes easily enough curing brine for a 5 pound brisket, cured in a somewhat large-ish container. If you were to use a 2-gallon freezer bag or marinating bag, you would likely need just half (or less) of the amount of brine and brine spices.
Ingredients
Pickling spices:
* 1 Tbsp whole mustard seeds (brown or yellow)
* 1 Tbsp coriander seeds
* 1 Tbsp red pepper flakes
* 1 Tbsp whole cloves
* 1 Tbsp whole black peppercorns
* 6 large bay leaves, crumbled
* 2 teaspoons ground ginger
* 1/2 stick cinnamon
Brine:
* 1 gallon water
* 2 cups Kosher salt
* 5 teaspoons pink curing salt*
* 3 Tbsp pickling spices
* 1/2 cup brown sugar
*Pink curing salt, or sodium nitrite, goes by many names, such as Prague Powder #1 or DQ Curing Salt #1, and is available online and may be available at your local specialty market or butcher shop. If you don’t have it, you can still make corned beef, but it is necessary for that vibrant pink color we associate with corned beef. And it adds flavor too. Without it the corned beef will be a dull grey color. [Rc note: see, I couldn’t get this at all, but I used the curing salt mix from Weschenfelder and it worked out fine]
Brisket:
* 1 4-5 pound beef brisket
* 1 Tbsp pickling spices
Method
I made chili this weekend. It was nummilicious, but there is room for improvement. Though the original recipe calls for beef, I made it with turkey breast so that Katy’s mom could try some. I’ll try again with beef next time, and possibly add a bit more liquid and more heat. Even though the heat seemed quite fiery while it as cooking, once it was well reduced and had stood in the fridge overnight, it really mellowed out. I had also put some bacon off-cuts in the mix, but they were waaaay too salty for the end result.
Ingredients
2 tsp ancho chili powder
1 tsp chipotle chile powder
1 Tbsp ground cumin
2 tsp ground oregano
1 tsp thyme
1/2 tsp ground coriander seeds
3-4 Tbsp water
6 strips bacon
One 2 1/2 pound braising steak (aka chuck roast), cut into 1/2-inch cubes
1 medium white onion, chopped
1 large green pepper, chopped
1 large tin plum tomatoes
2 1/2 cups veggie stock
1 tin dark beer
1 Tbsp freshly squeezed lime juice
1 tsp sugar
Grated cheddar cheese and chopped red onion for garnish
Method
1 In a small bowl mix the chili powder, chipotle chili powder, ground cumin, oregano, thyme, and ground coriander seeds. Mix in water so that chili forms a light paste. Set aside.
2 Cook the bacon in a large skillet on medium high heat until crisp. Use a slotted spoon to remove from pan and set aside on a paper towel. Pour bacon fat from the pan into a separate container, reserve. When the bacon cools, crumble it into smaller pieces and set aside.
3 Increase heat to medium high, add back in 1 Tablespoon of bacon fat. Working in batches so that you don’t crowd the beef (crowding will steam cook the meat instead of browning it), brown the beef cubes on all sides, lightly salting as you cook the beef. Remove beef from pan, set aside.
4 Add another Tablespoon of bacon fat to the pan. Add the chopped onions and sauté until soft, about 5 minutes. Add the garlic and jalapeño, cook until fragrant, 1 minute more. Add the chili paste and cook for 2-3 more minutes.
5 Into a 6-quart thick-bottomed Dutch oven, put onion chili mixture, beef, bacon, tomatoes (break up the whole tomatoes with your fingers as you put them in the pot), water, lime juice and sugar. Heat the chili on medium high heat until it comes to a simmer. Then reduce the heat to low. Cover and cook for 1 1/2 hours. Then uncover and cook for another half hour, keeping the temperature at a place where you can maintain a simmer.
6 Mix the cornstarch powder into a little water to dissolve the corn starch (otherwise you’ll have lumps to deal with) and add to the chili to thicken it. Add salt to taste. Adjust seasonings. Depending on the acidity of the tomatoes and lime juice you may need a little more sugar to bring the stew to balance. At this point you can also add a little more chili powder if you desire more heat.
Sprinkle with grated cheddar cheese and chopped red onion. Serve with cornbread, tortilla chips, and or rice.
EDIT: I forgot to mention that I got the chili powders from Cool Chili. They rock.
This is another recipe we saw recently and just had to try out. It’s from the Beeb’s Something for the weekend. I prepared the mix the night before we wanted to cook it for dinner and it came out tasting loverly! The best thing though is that it makes excellent leftover meatloaf sandwiches :)
Ingredients
1 free-range egg, beaten
150ml oz milk
300g soft white bread, cut into cubes
1 tbsp Dijon mustard
pinch dried thyme
pinch freshly grated nutmeg
pinch dried basil
handful fresh parsley, finely chopped
1 onion, finely chopped
1 large stalk celery, finely chopped
1 medium carrot, finely chopped
225g bacon lardons, fried until golden-brown all over
salt and freshly ground black pepper
700g minced beef
200g minced pork
3 slices streaky bacon
ketchup, for basting
Method
1. For the meatloaf, place the egg and milk into a large bowl and mix together.
2. Add the cubes of bread and leave to stand for 15 minutes.
3. Mash the milk and egg-soaked bread with a fork.
4. Add the mustard, thyme, nutmeg, basil, onion, celery, carrot and bacon lardons, season with salt and freshly ground black pepper and mix well.
5. Add the beef and pork mince. Mix well to combine thoroughly.
6. Cover with cling film and place into the fridge to chill (overnight if possible, but for at least two hours).
7. Preheat the oven to 180C/360F/Gas 4.
8. Transfer the meatloaf mixture into a 30cm x 11cm/12in x 4in loaf tin.
9. Top with the streaky bacon slices to cover. Baste with ketchup.
10. Transfer to the oven and bake for 55 minutes, or until completely cooked through.
11. Remove from the oven and leave the meatloaf to stand for 5-6 minutes before slicing.
13. To serve, slice the meat loaf. Place a slice onto each plate with a dollop of mashed potato alongside. Pour over some gravy and enjoy.
Ingredients
* 2 lb. stewing beef
* 4 onions, white or yellow
* 3 Tbsp. sweet paprika
* 2 bay leaves
* 1 L. water
* 4 peeled and diced potatoes
salt & pepper
Cut beef into 1 inch squares, add 1/2 tsp. salt. Chop onions and brown in olive oil, add beef and paprika. Let beef simmer in its own juice along with salt, paprika, bay leaf and 1/2 liter of water for 2 hr. on low heat. Add more water as required during simmering period. Add diced potatoes and remaining salt. Cover and simmer until potatoes are done and meat is tender.